
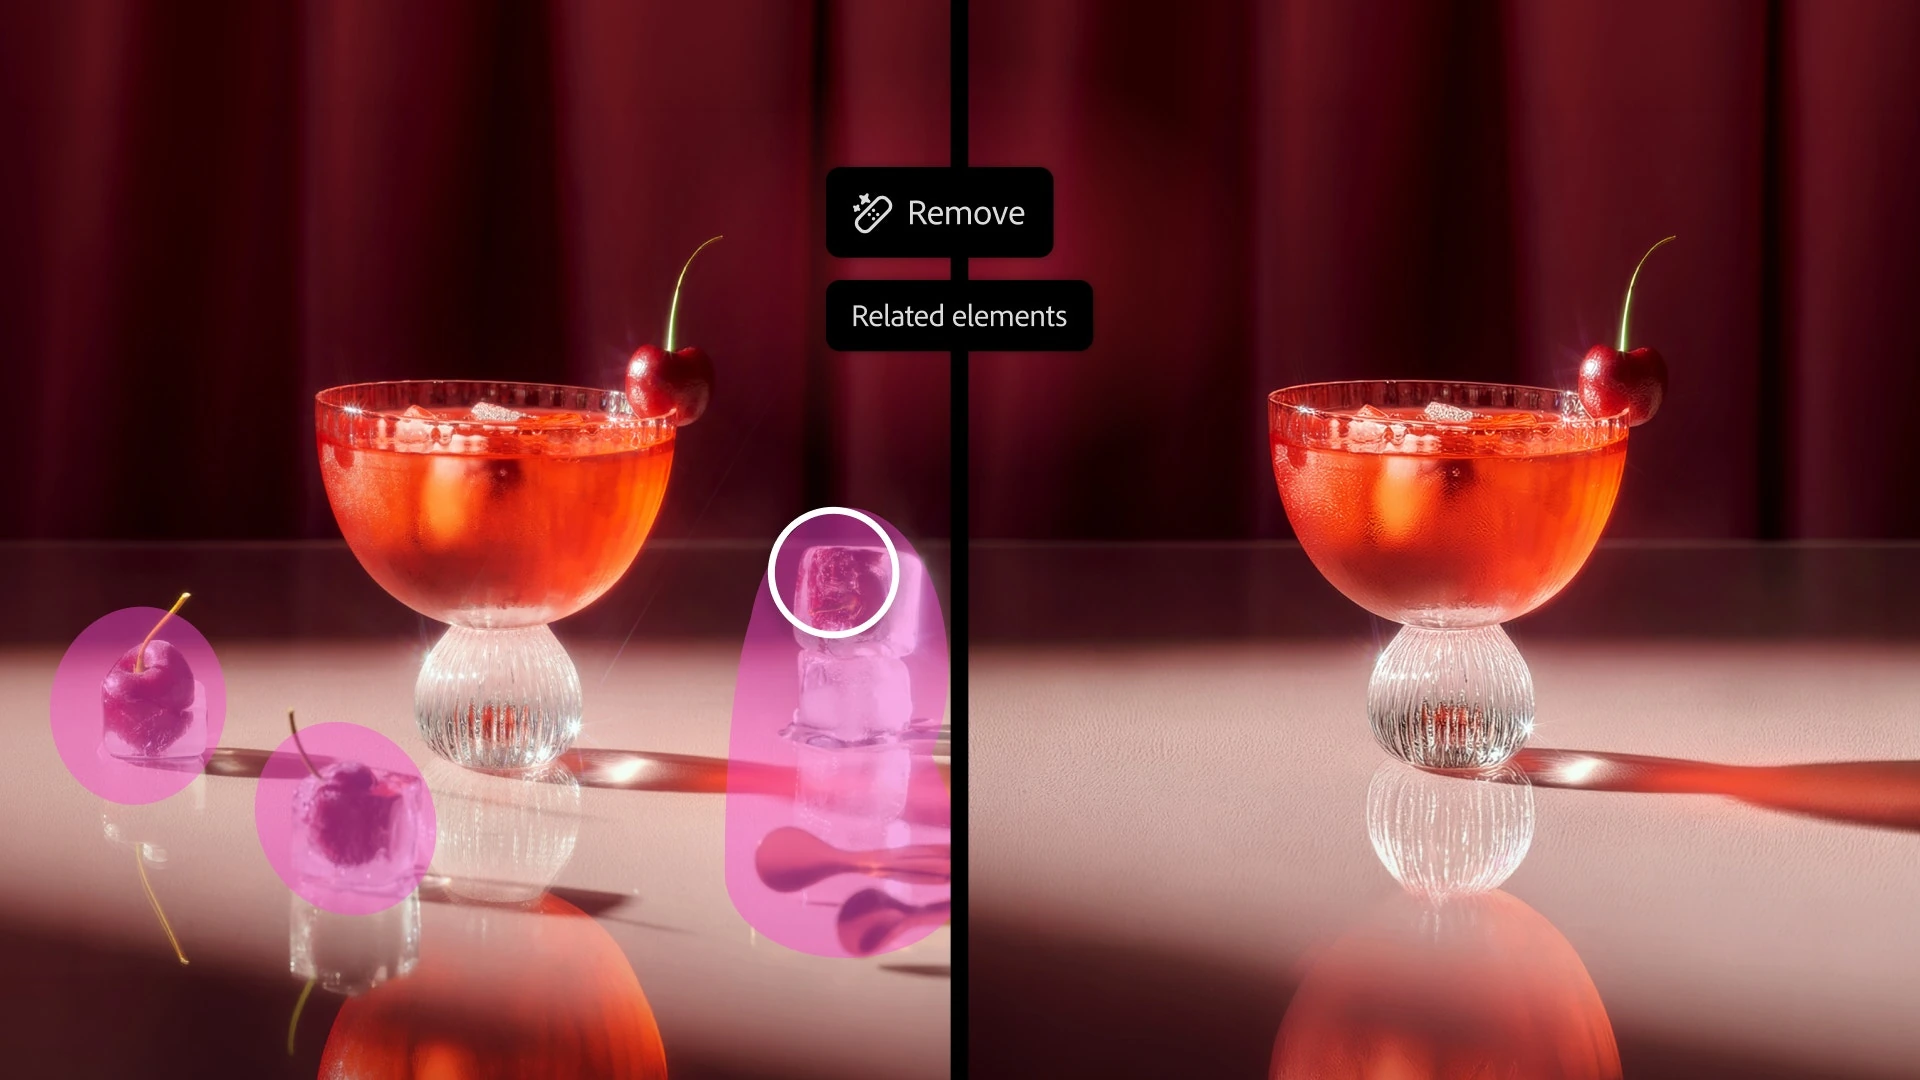
Photoshop 28.0 adds tools for changing lighting after a shoot, removing objects together with the traces they leave, and reviewing edits more quickly. Adobe presented the updates at MAX on November 10. A useful way to assess them is through a specific job: preparing a photograph for a listing or poster while keeping its colors, texture, and geometry believable.
What is available in Photoshop 28.0
The official November release notes list Relight, Quick Compare, and the updated Remove tool. Adobe also presented other capabilities, including experiments for Photoshop beta. A feature appearing in a presentation therefore does not establish that it is available in your regular editor. Check the installed Photoshop version in Creative Cloud before starting.
For a small exercise, use your own photograph of a table: a product sits beside a window, an unwanted cable lies nearby, and the lighting looks cold. This is a suggested workflow to repeat with your own image. The aim is a clean photograph of the same object that you can publish without losing details that matter.
Relight puts lighting on a separate layer
Relight supports up to three light sources, with controls for position, color, intensity, and diffusion. Processing applies to the active layer, while the original remains underneath a separate Relight Layer. Applying the effect requires an internet connection; Adobe’s documentation lists a cost of 30 generative credits.
- Open the photograph and select an unlocked pixel or Smart Object layer.
- Choose Layer → New Relight Layer.
- Move the light and adjust its settings. Start with one source so that its effect is easier to assess.
- Select Done. Adjustments use a lower-resolution preview; confirming generates the final result.
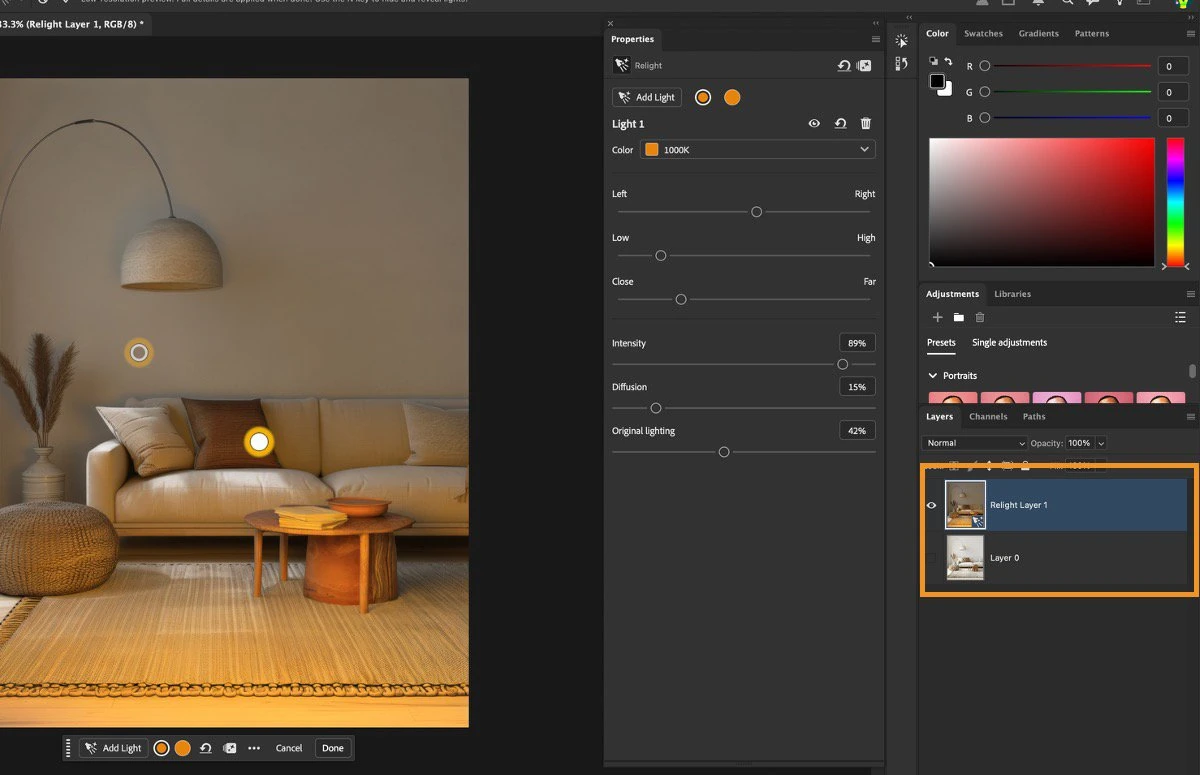
In this exercise, begin with a soft, neutral light from one side. Check the white table and the product’s color: a warmer mood should not turn a white surface yellow. When an image represents a real product, excessive enhancement can give customers the wrong impression of its appearance. Keep the original close by for comparison.
For a series of similar photographs, edit one image first and settle on a suitable lighting strength. It is easier to establish a usable look at this stage than to reconcile the style after processing an entire catalog.
Remove the cable, then inspect its shadow
The new Remove related elements mode looks for effects associated with an object, such as shadows, reflections, or marks on a surface. In the Remove options, select Generative AI on and Cloud generative AI processing, enable related-element removal, draw around the object, and confirm Remove. Edits are placed on a new layer.
This mode uses generative credits, and the optional Enhance step adds to consumption. Avoid applying enhancement automatically after every attempt. First identify a remaining problem that it might help resolve.
After removing the cable, inspect where it touched the table and the nearby product edge. On a textured surface, look for repeated patches, blurred grain, and broken lines. For a difficult area, undoing a poor result and working on a smaller section is more useful than covering the defect with further generations.
Use Quick Compare before exporting
Quick Compare shows current edits against the original document state. Open it in the Tools panel or choose View → Quick Compare. Left/right split, top/bottom split, and single-view modes are available. They make it easier to see the cumulative effect of several operations rather than judging each change in isolation.
| Check | Reason to revise |
|---|---|
| Outlines and lettering | An edge has changed shape, or small text has become different or unclear. |
| Color | The material looks different from the original photograph and the physical object. |
| Surface beneath the object | A natural contact shadow has disappeared, or a patch has replaced the texture. |
| Publication size | The product becomes hard to see, while the added effect attracts all the attention. |
Inspect the image twice: enlarged to find defects, then at the size readers will actually see. An effect that looks good across a monitor can make a small banner harder to understand. Save the layered working document separately from the copy intended for a website or chat so that you can return to a particular editing step.
If the next task is a poster with text, composition and readability deserve their own pass. Our Affinity poster workflow for print and chat explains why separate versions can work better for different ways of sharing. Assess these Photoshop tools by the same practical standard: whether they help produce a publishable image whose changes you can inspect and control.


Join the conversation
Stay on topic and respect other readers. Your first comment may appear after editorial review.